Install/3-3/CMConfig
From Convention Master Documentation
<< Previously: 3.2 - Configuring the Database
Connect Convention Master to the Database
Please follow these steps if you are setting up CM for the first time for your event on a fresh database. If you plan to import an already existing database from a previous/other installation, please skip this step and check our guide on moving a database.
1. Make the configuration directory writable so that the db_connect.php file can be created.
sudo chmod ug+w /var/www/shared_php/
2. Reload the setup URL and there should be no error message at the bottom of the screen:
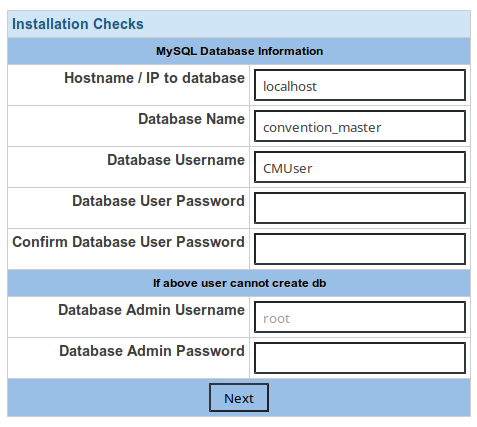
3. Enter information:
- Hostname
- The network address of the database (Usually localhost)
- Database Name
- The name of the database to install Convention Master in. If you have been following our instructions and set your database up in step 3.3, leave this as "convention_master".
- Database Username
- The name of the database user to use for Convention Master. If following our instructions, leave this as "CMUser".
- Database Password
- The password of the database user to use for Convention master. You may have created this in the previous step. Create a strong password that is not used for any other purpose. This can be as complicated as you wish, you will likely not need to know this password ever again.
If you have not already set up the Convention Master database (see previous step), you can enter the details of a MySQL user with permissions to create a database and users, and Convention Master will set the user up for you. (This is not the recommended way to configure your database.)
- Database Admin Username
- If you have an administrator user who can create
- Database Admin Password
- Enter the password you set up for your MySQL administrator user.
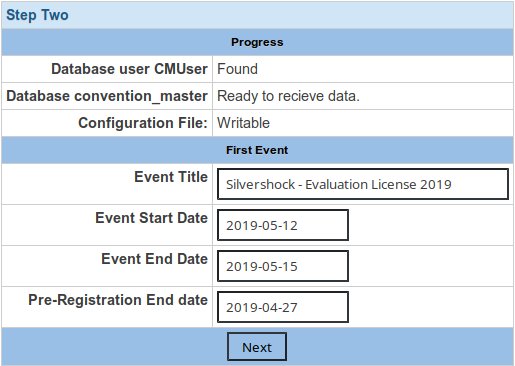
4. Click "Next" to save the database configuration, and begin setting up your Convention Master system user account and event details:
- Event Title
- This is the name of your event
- Event Start Date
- Enter the first date your event is open to attendees.
- Event End Date
- Enter the last date your event is open to attendees.
- Pre-Registration End Date
- The final date that you will accept registrations in advance of the event.
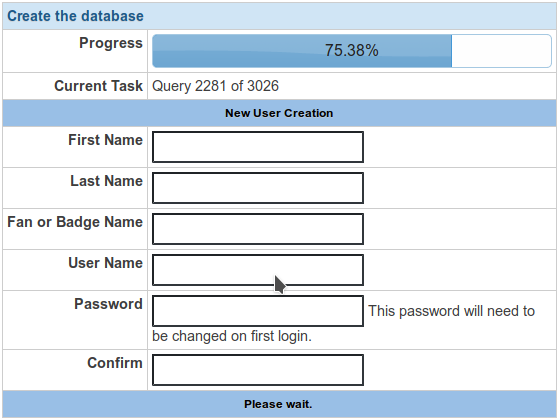
5. Now that your event has been created in the database, Convention Master will begin installing itself. You will be able to see its progress at the top of the next form. While the installation process is continuing, we need to create an administrator account for Convention Master. Go ahead and fill in this form with the details of the person who will become the first system administrator. When you're done, and the installation progress has reached 100%, click next.
6. You should see a message confirming that installation of Convention Master has been completed, and giving you a link to use to visit the login page. Congratulations, you have installed Convention Master! There's just one bit of cleanup we need to do.
7. Change the permissions on the shared_php folder so it is no longer world-writable.
sudo chmod 755 /var/www/shared_php/
If the server you are installing Convention Master on is intended to only take registrations, and will not be printing badges, your setup is now complete. The rest of this guide deals with setting up printing systems. We do not recommend installing printing systems on public servers that do not require them.


