Guide/Paymentgateways/SquareSetup
Jump to navigation
Jump to search
Setting up your square for Convention Master
This will happen the first time you log into the Developer.squareup.com/apps website. This will help you through setting up your first initial applciation (Convention master)
1) Sign into the square DEVELOPER website. (https://developer.squareup.com/apps)
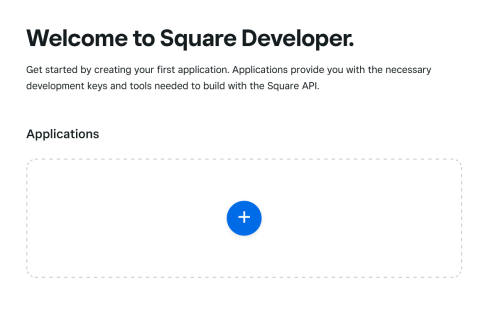

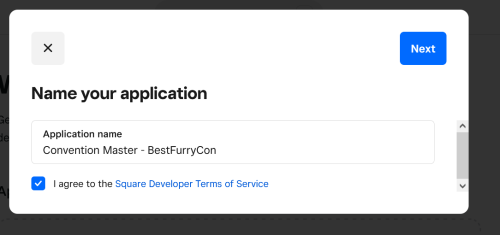
2) Click the Plus Icon to add a new "App" and it will ask you to Name your Application You can name your application "Convention master - Event Name"

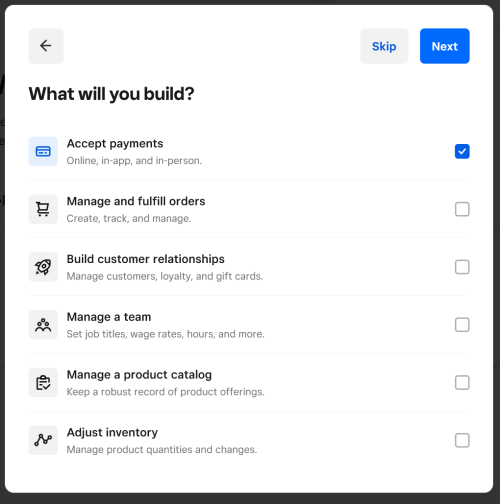
3) Check the "Accept Payments" Checkbox.

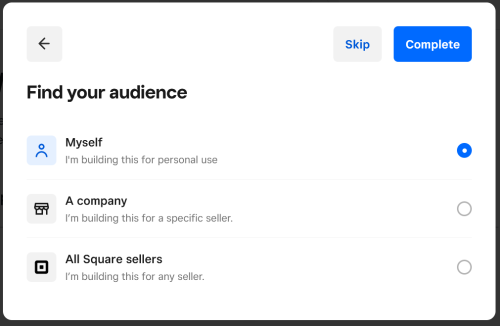
4) Check the "I am building this for personal use"

Obtaining Access Tokens and such for CM
Next we need to get the API keys into the convention master system.
- Log into the developer.squareup.com/apps website. Click on the "Open" button on the Convention Master App
- Choose Sanbox Or Production - Determine if we're looking for "Sandbox" or "production" API keys. It is a good idea to add both to your CM install so you can perform Test Payments with the Sandbox keys. To choose which keys you'll be downloading you'll want to set the slider at the top.
- We now need to find the Access Token and Location ID - Copy and Paste the Application ID, and the Access Token (Note you must click "Show" to be able to copy the access token)
- We will now need to find our "Location ID" - You Will find a menu on the left called "Locations" copy and paste the Location ID from here.


Now we need to log into our Convention Master system
- Log into your Convention Master installation,
- Navigate to the "Admin Install - Payment Gateways"
- Click on the "Add New Gateway" button
- Pull down and select "Square", once you have you should see the following inputs.
- Copy and Paste your "Location ID", "Application ID", and "Access Token" if your setting up the sandbox, set the sandbox mode to "ON"
- Now we need to enable this payment method for the event.
- Click on "Admin-Event" and "Event Settings" ("Modify Events" on older versions)
- Click on the "Payments" tab
- Check the newly added Payment method, to Enable the Gateway
- Click "Save"
- Now we need to enable this gateway for payment collection on a specific Kiosk
- Click on "Kiosks"
- Choose a kiosk to edit and click "Edit"
- Make sure "Online Payment" is your Ending Step
- Click Next
- Scroll to the bottom and expand the "accordian" folder that is for "Online Payment"
- Scroll down to the "Payment Gateways" and choose "Yes" on the "Enabled" column for all the payment methods you would like to enable for this kiosk.
- Click "Save"


