Install/4-5/CivetPrint
From Convention Master Documentation
<< Previously: 4.4 - Set up Socket Printers
Set up CivetPrint
Useful For: Fullpage Printing
Limitations: URL/HTML Only, Windows only
CivetPrint is a Windows-only program used to pass print jobs from Convention Master to any Windows printer.
It is important to understand that the CivetPrint printers can only be used for fullpage printing. In addition the CivetPrint print method may not work if:
- You are accessing your CM installation using the https:// method without a properly signed SSL certificate
- If you get any popup errors when browsing to the CM URL using a browser (Such as popups regarding self-signed certificates or certificate errors)
Install the Printer
1. Install the printer onto the windows machine using the manufacturer’s instructions. Do this for each windows printer you are going to use.
2. Assign the windows computer a static IP or a static-dynamic IP.
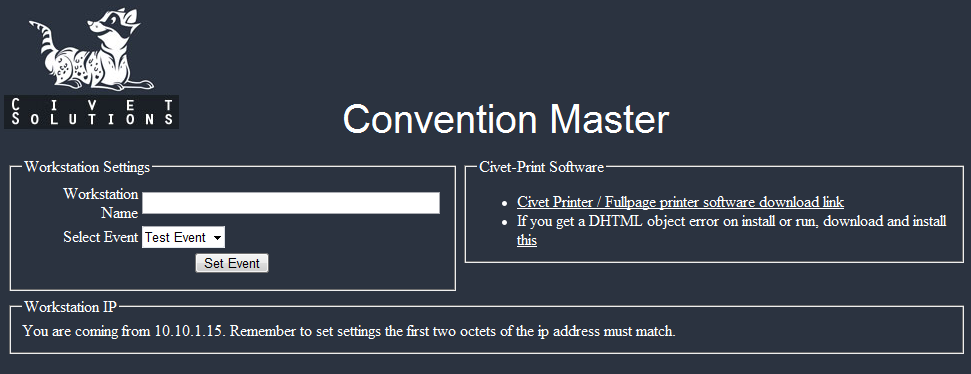
3. Go to the URL (http://10.10.2.10/) you should see the following web-page load. If you do not, then the computer you are coming from is not in the same subnet as the server. Move the client to the same class B subnet as the server.
4. Download the CivetPrint program using the “Civet Printer / Fullpage Printer software download link” then run the installer.
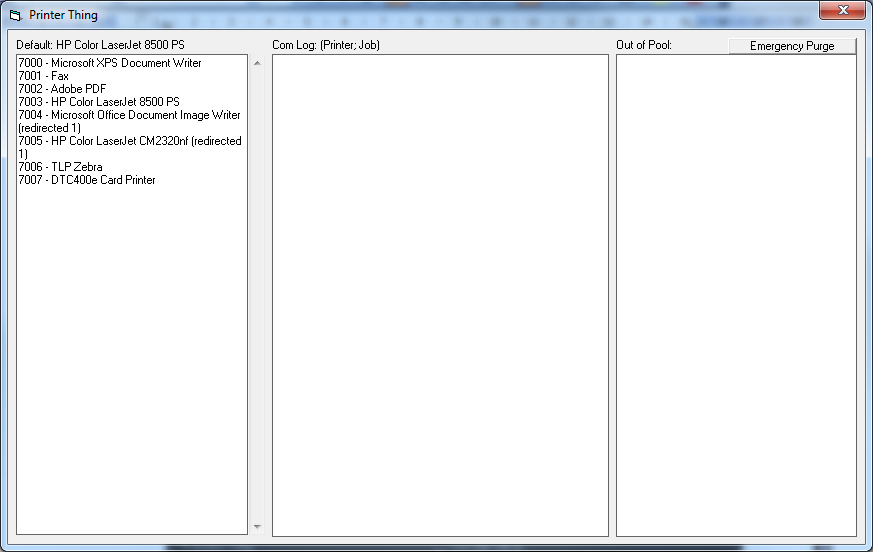
5. Run the CivetPrint program, the following window should pop up when Civet Printer works properly. If you get a DHTML object error. Go back to http://10.10.2.10) and use the other download link it mentions.
6. It is important to make a note of the 7xxx numbers beside each printer. Start the Civet Printer program several times to ensure that the port numbers do not change.
7. Make note of the 7xxx numbers beside each printer name. This is the PORT number assigned to each printer. This is important information information for the next step.
Set up the Printer in Convention Master
1. To install the CivetPrint printers in convention master access your convention master console by browsing to http://10.10.2.10/console/
2. Click on “Admin – Printing”, then “Manage Printers”
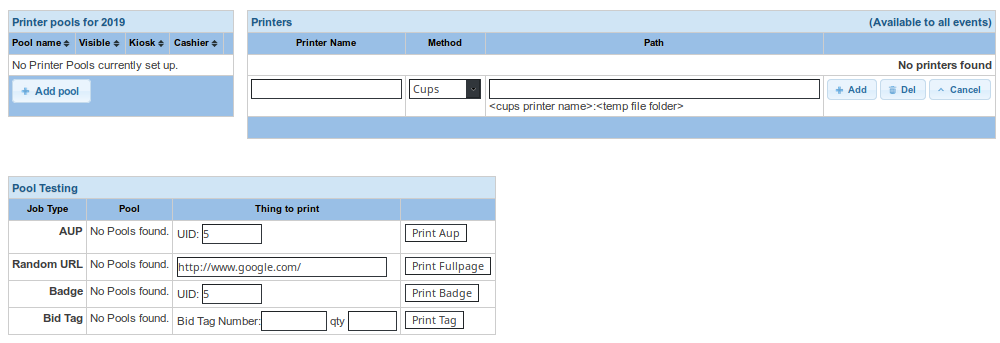
3. In the upper right of the manage printer screen you can add your printer. If this is not the first printer you have set up, you may need to click the “Add Printer” button first. Then set the following:
- Printer Name
- This is the name you want to assign the printer.
- Method
- Choose Civetprint
- Path
<IP>:<Port>where<IP>is the IP address of your Windows computer running CivetPrint, and port is the 7xxx port number for the printer you are setting up. For example:10.10.2.15:7001
4. Click "Add"
5. Once set up you should see your entries in the Printers table and they should look like this:
Test the printer
To test the printer functionality, add the printer to a printer pool and then use the Pool testing section. Read the Setting up printer pools section of this manual to perform the tests.
Troubleshooting CivetPrint Printers
To troubleshoot CivetPrint printers. Simply open a command prompt, and then telnet to the IP address and port number associated with the printer your trying to test. Once the telnet connection is established enter any website address, such as http://10.10.2.10/ Please note that the http:// is required at the beginning, and you may not see yourself typing in the telnet window. Once you press enter the request should be fulfilled and the page should be sent to the printer.
- If the page doesn’t come out this means that there is something wrong with the Civet Printer program, the windows computer, or that Internet Explorer cannot open the page without popups.
- If the page does come out then this printer is working, and the problem is with the printer setup in CM.


