Install/4-1/CUPSConfig
From Convention Master Documentation
<< Previously: 4.0 - Setting up Printing
Configure CUPS
CUPS is useful for: Fullpage Printing / Label Printing / Receipt Printing
Limitations: Requires a temp folder to print properly, and requires the package html2ps to print fullpage printouts.
It is important to make sure that if you plan to print fullpage printouts to a CUPS printer you have the package html2ps installed.
Install htmldoc
This method uses htmldoc functions, so you'll need to have htmldoc installed. If you did not install your packages from the list in section 2, you can install it now:
sudo apt-get install htmldoc
Install the printer
This example will assume you are installing a Ethernet capable HP Laserjet 4 printer (because those are the ones we have available to play with!).
1. Browse to port 631 on your server (e.g. https://10.10.2.10:631/) to get to the CUPS control panel. Depending on the CUPS install, you may be asked for your password immediately, or later on in the process. If a password prompt comes up, enter your Ubuntu Username and Password.
2. Across the top click “Administration” then click “Add Printer”
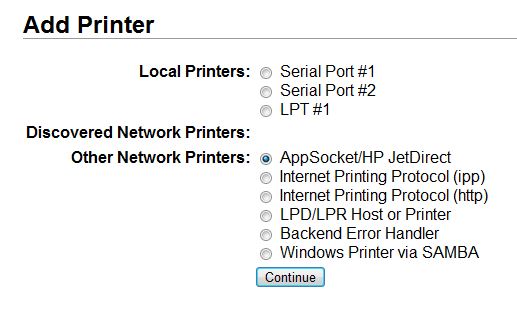
3. Choose “AppSocketHP JetDirect” and click “Continue”
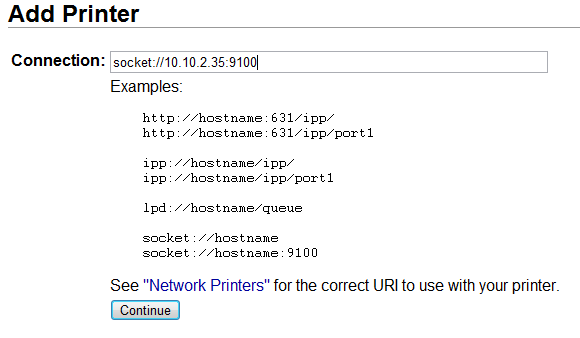
4. In the connection type socket://<ip>:<port> For example, our printer is at 10.10.2.35 and because it’s a standard print server we know the port is 9100. So we use socket://10.10.2.35:9100
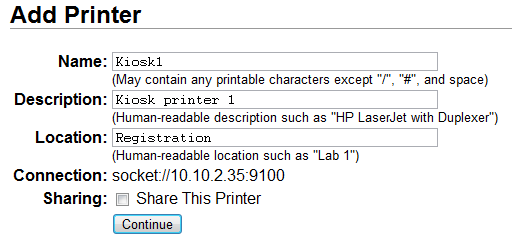
5. Next we set up the name, description and location of the printer. When choosing a name, it is important to choose a printer name that has no spaces or special characters. We will often use the simplified name Kiosk1 or Reg1 and set the rest of the printers up as Kiosk2 Kiosk2 etc.
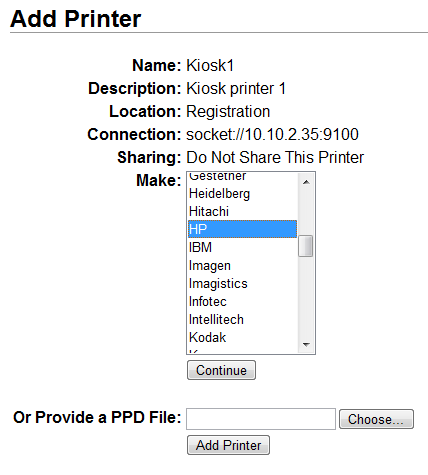
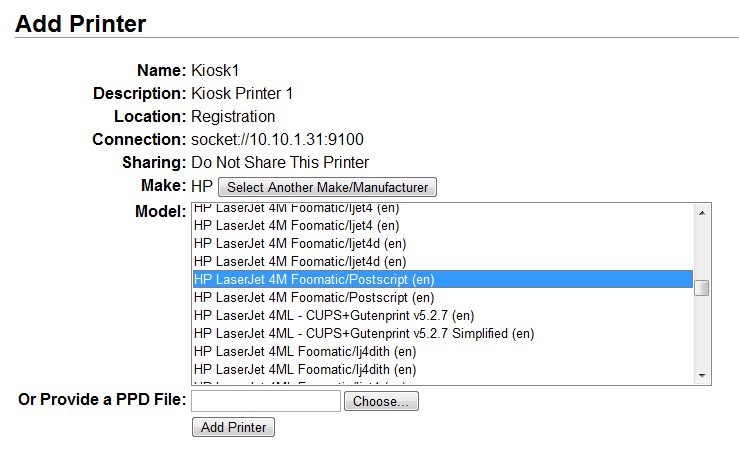
6. Now we find our printer's drivers, starting with choosing HP from the list and clicking Continue.
7. Here we look for our specific model of HP printer. Select it and click Continue
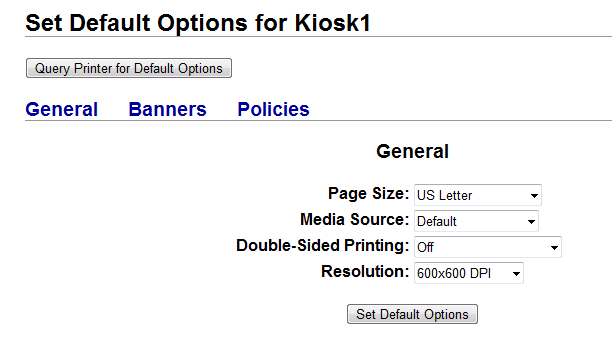
8. Next we set the default printer options for the printer. Make sure to set your page size, this is especially important if this is a card printer or a label printer.
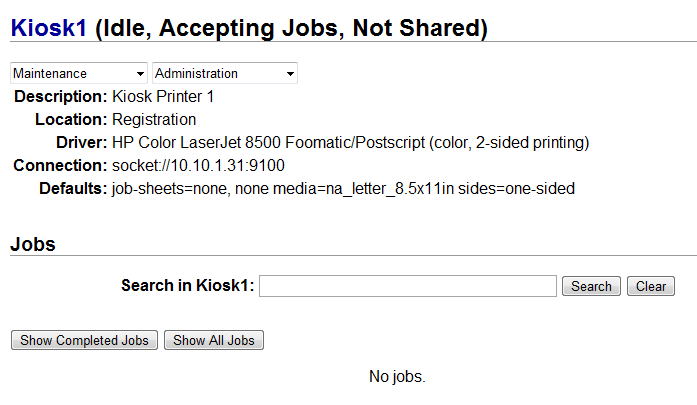
9. When the wizard finishes you should be brought to the control panel page of the printer.
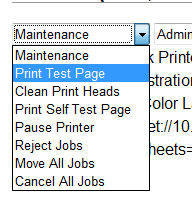
10. You can test print by pulling down the maintenance pulldown and choosing “Print test page”
Set up the printer in Convention Master
1. One important step for CUPS printers is to set up a temporary folder that the files can be written to.
2. Log into the console of your server through either ssh or directly.
3. If the folder /var/www/tmp/ does not exist. (This assumes that the code root of your Convention Master install is /var/www - replace this path in the following commands if it is not.)
a. Run the mkdir command to make it
mkdir /var/www/tmp
b. Now set that folder world-writable using the chmod command:
chmod 777 /var/www/tmp/
4. Make a temp folder for this specific printer
mkdir /var/www/tmp/kiosk1
5. Now set that folder world-writable using the chmod command:
chmod 777 /var/www/tmp/kiosk1/
6. To install the CUPS printers in convention master access your convention master console by browsing to http://10.10.2.10/console/
7. Click on “Admin – Printing” then “Manage Printers”
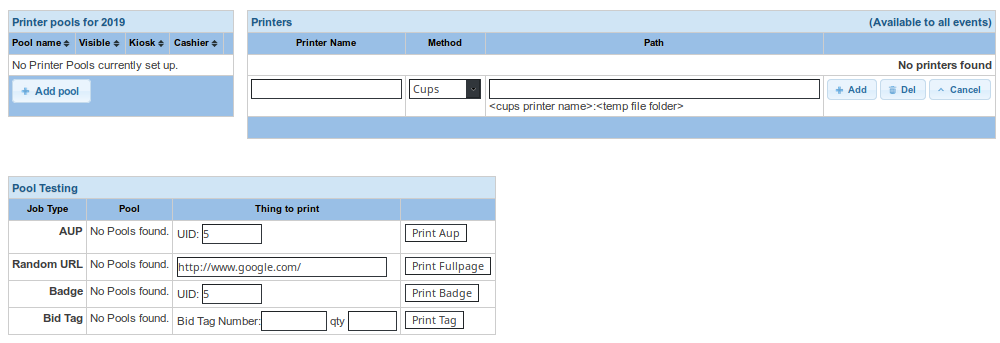
8. In the upper right of the manage printer screen you can add your printer. If this is not the first printer you have set up, you may need to click the “Add Printer” button first. Then set the following:
- Printer Name
- This is the name you want to assign the printer.
- Method
- Choose CUPS
- Path
<Cups Printer name>:<Path to tmp folder>where CUPS printer name is the printer name as you have called it in CUPS (Case sensitive) and the Path to tmp folder is the path you just created. For example for our example printer the path would beKiosk1:/var/www/tmp/kiosk1/The trailing slash is very important!
9. Click Add
10. Once set up you should see your entries in the Printers table and they should look like this:
Also note, that if you hover over the URL string for the printer path. A popup will appear telling you the path to the temp folder.
Test the printer
To test the printer functionality, add the printer to a printer pool and then use the pool testing section. Read the Setting up printer pools section of this manual to perform the tests.
Troubleshooting CUPS Printers
- Use CUPS itself: The first way to troubleshoot a CUPS printer is to use the ‘print test page’ from the CUPS administration panel itself, located at https://10.10.2.10:631/
- Check the temp folder: The second way to troubleshoot a print job, is to watch the contents of the temp folder. If the Convention Master system is sending print jobs, you should see temp files appear in that folder.
- Check to see if the .ps file can be made: Before the file is sent to the printer, a *.ps file is made. The failure to render this *.ps file might be the cause of your issues. To try to make this *.ps file, run the following command:
htmldoc --webpage --header ' ' --footer ' ' --fontsize 10 --left 0.5in --right 0.5in --top 0.5in --bottom 0.5in -f test.ps "http://www.google.com"
- Try sending the print command yourself: From the command line, switch into the temp folder you have designated from the printer and try running the command on one of the temp files. See if any errors come up.
The command that civetprint uses to send the print jobs is:
lp –d <printer_name> <file>
Or for images:
lp –d <printer_name> -o fitplot <file>

