Install/4-2/EPLConfig
From Convention Master Documentation
<< Previously: 4.1 - Configure CUPS
Configure EPL Printers
(As an example, we will use a Zebra 2844 model printer)
EPL is useful for: Label Printing
Limitations: Requires python3-pil to print, Versions prior to 10.0.9 Require pkipplib to print.
It is important to make sure that you have followed the instructions for setting up PkippLib before you continue here.
Install the printer
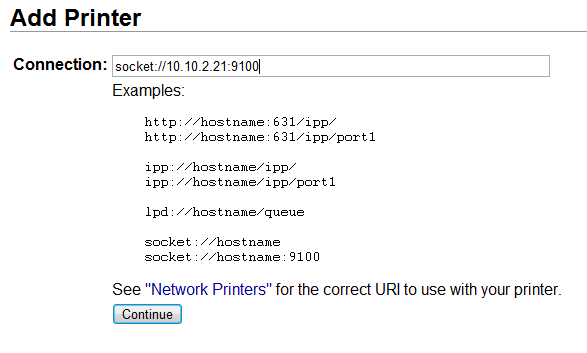
This example will assume you are installing a Ethernet capable EPL printer or that you are using a standard Print-server to make the printer Ethernet capable. Most print servers use port 9100 but some use other ports.
1. Download the zebraep2.ppd file from /srv/www/printing/ to your local computer. A easy way to get this is to browse to http://<your install path>/printing/zebraep2.ppd and save the file.
2. Browse to port 631 on your server (e.g. https://10.10.2.10:631/) to get to the CUPS control panel. Depending on the CUPS install, you may be asked for your password immediately, or later on in the process. If a password prompt comes up, enter you Ubuntu Username and Password.
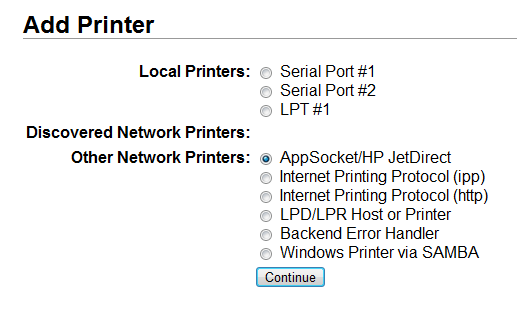
3. Across the top, find and click “Administration”, then click “Add Printer”
4. Next, we set the socket path
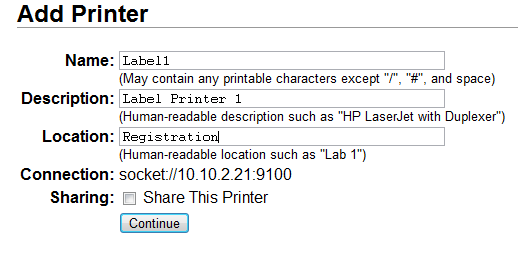
5. Now we set up the name description and location of the printer. When choosing a printer name, choose a printer name which has no spaces or special characters, such as "Label1"
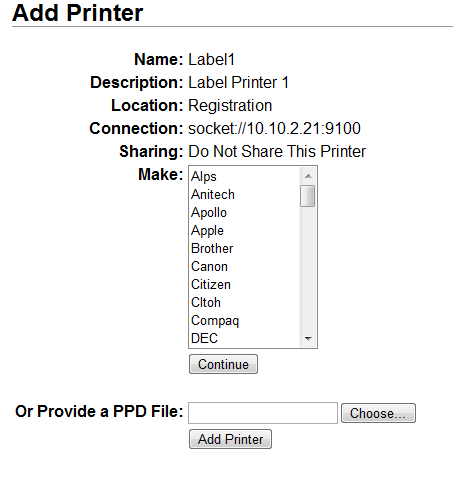
6. Next we need to choose “Provide PPD File”. To provide a ppd file click “Choose” and select the file, then click “Add Printer”
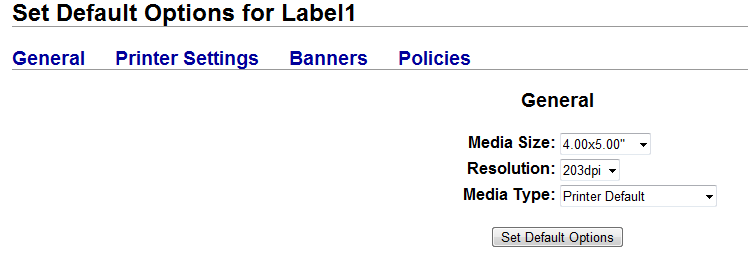
7. Make sure to set up the default printer options correctly. This is especially true for paper size.
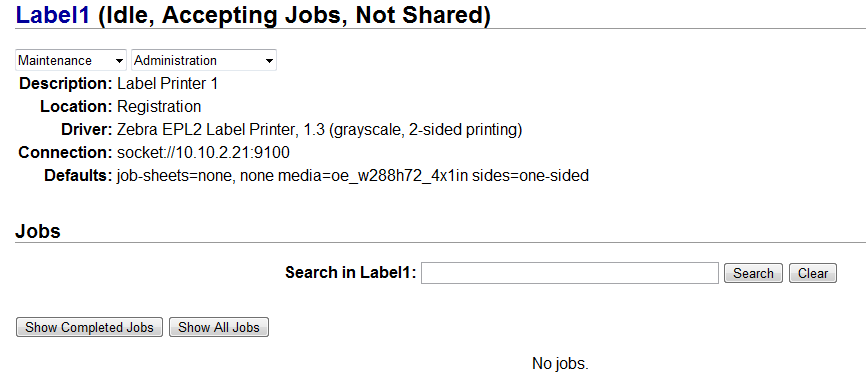
8. When the wizard finishes you should be brought to the control panel page of the printer.
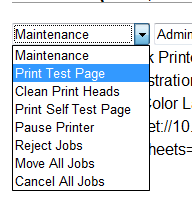
9. You can test print by pulling down the maintenance pulldown and choosing “Print test page".
Set up the printer in Convention Master
1. To install the EPL printers in Convention Master, access your console by browsing to http://<your address>/console/
2. Click on “Admin – Printing” then “Manage Printers”
3. In the upper right of the manage printer screen you can add your printer. If this is not the first printer you have set up, you may need to click the “Add Printer” button first. Then set the following:
- Printer Name
- This is the name you want to assign the printer.
- Method
- Choose EPL
- Path
<CUPS Printer name>where CUPS printer name is the printer name as you have called it in CUPS (Case sensitive)
4. Click "Add"
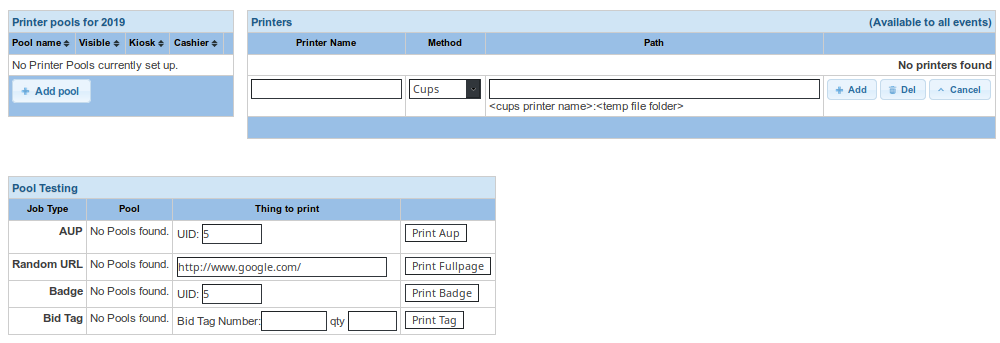
5. Once set up you should see your entries in the Printers table and they should look like this:
Also note, that there is a ‘Recalibrate’ button for EPL printers, which will re-set the media sensor.
Test the Printer
To test the printer functionality, add the printer to a printer pool and then use the Pool testing section'. Read the Setting up printer pools section of this manual to perform the tests.
Troubleshooting EPL Printers
- Use CUPS itself: The fisrst way to troubleshoot a CUPS printer is to use the ‘print test page’ from the CUPS administration panel itself, located at port 631 on your server (e.g. https://10.10.2.10:631/)
- Command Line: The second way to troubleshoot an EPL printer is to use the command line to try and send the print job. The command below will print a label containing the text "error" to the badge printer located at
10.10.2.10.
/srv/www/printing/PrintBadge.py –s Label1 http://10.10.2.10/shared_php/badge_image.php?encryp_string=ppp

